


Growing up in suburban New Jersey, being in nature was always life-giving to me. But I didn’t have many personal experiences with campfires, other than going camping in 6th grade with my friend and her family to the Catskill Mountains in upstate New York and listening longingly to my older brother’s Boy Scout trip escapades. When I went off to college in the South, my next campfire memory was literally singing “Friends Are Friends Forever” around a bonfire one weekend during a barn dance at Michael W. Smith’s farm (hello, late ’90s in Nashville).
The funny thing is, I don’t really love camping itself. I just love the experience of being around a fire. So when Steven and I purchased our first home in Dallas after we got married, the first thing we did was build a firepit in our urban backyard with some sand and stones. Eventually, we added pea gravel around it and an official fire ring that our friend welded for us out of a metal barrel—it had stars carved into the sides, and the handles were made from horseshoes. Around it, we played guitar, drank wine, held our wide-eyed toddler tightly who was mesmerized with the flames, and burned 10 years of paperwork we’d accumulated when it was finally time to move away from that beloved home and yard.
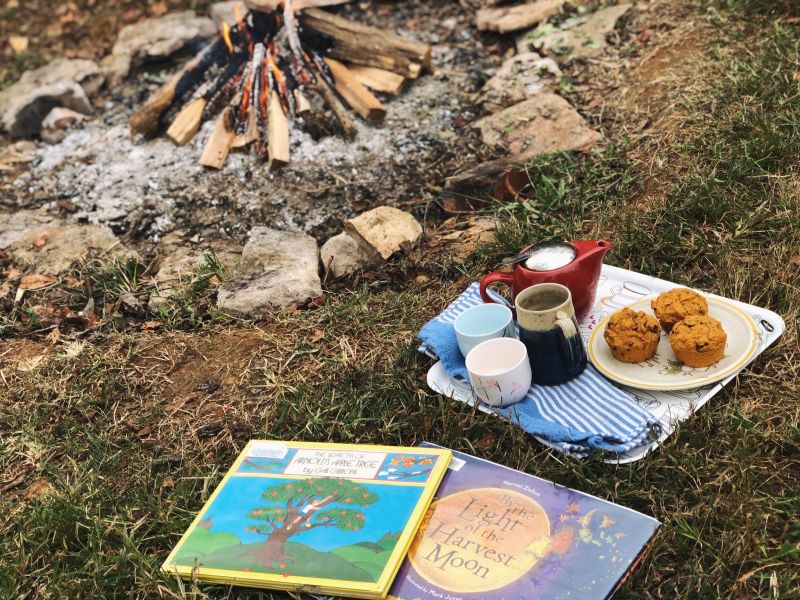
Now, in practically every month of the year on our farm in Tennessee, you’ll find us gathered around the backyard firepit on weekend evenings with friends while children—from toddlers to teens—play nearby and the last bit of sunset sinks behind the pines.
It seems we’ve become disconnected these days from the basic elements of life—earth, air, fire, water—and how they affect us on a daily basis. Learning how to build a campfire from scratch is a great way to reconnect with nature and develop one of those skills we should all have, yet most of us have zero idea how to actually do. I’m with you! I built my first-ever campfire by myself just a few months ago. At age 42. I promise it’s never too late to learn something new.
There’s no need to save up for a fancy firepit that costs hundreds of dollars. It’s easy to make a DIY one that you’ll enjoy for years. The “Lincoln Log” method I’m sharing here is a newer way of building a campfire so you put in the work on the front end, and then once it’s set and lit, you don’t have to do much besides enjoy the warmth, coziness, and connection.
Safety stuff first: Check your local laws. Firepits are legal in most cities in the United States, but there might be certain ordinances where you live requiring the fire to be a certain distance from your house. Some places require that if you’re using wood instead of charcoal, you have to be cooking food (time to break out the hotdogs and s’mores!). Generally, you should build your firepit in an open area about 10-20 feet from any trees or buildings.
1. Make your firepit.
Gather those old bricks you’ve had stacked behind your shed for years or purchase large stones or fire bricks. Make a circle with them as big or small as you’d like your firepit to be. Dig out any grass on the inside of the circle (for our firepit, we found big stones in our creek bed and just made a circle formation with them in a clearing in the grass). Here’s a simple design with fire bricks and gravel. For a more structured option, try this fire ring from Home Depot or this one from Tractor Supply.
2. Gather your wood.
I love this step—there’s something primal and adventurous about it, and it’s a great time to involve kids. Make sure the wood is dry and hasn’t been saturated by rain or the fire won’t work. Gather different sizes of wood and place them in piles from biggest to smallest: you’ll need large logs, medium logs, and various sizes of sticks. You can often find the smaller sticks around your yard, and if needed, you can purchase the medium/large logs at your grocery store or from another local source that sells firewood.
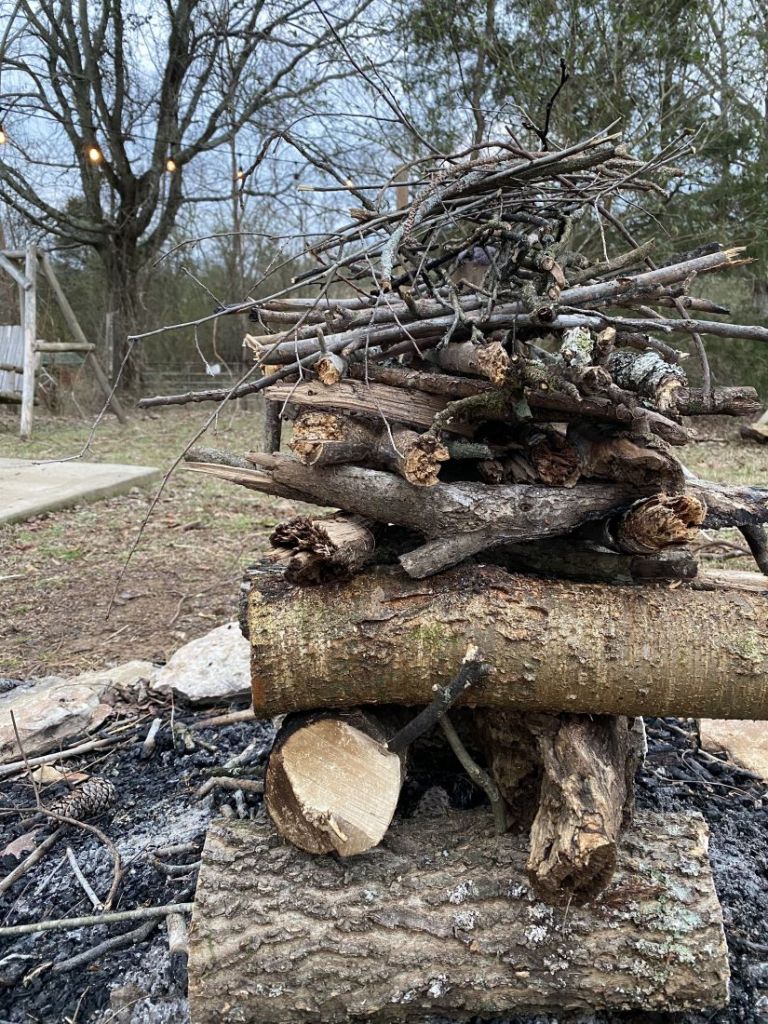
3. Stack your wood.
The key to this fire is building it up from largest to smallest. Stack your logs in a tower, starting with the largest ones on the bottom, in a Lincoln Log-type pattern. For each layer, keep adding the next smallest size of wood, all the way to the top, like this:

On top, add a pile of the smallest sticks, keeping some space between them.
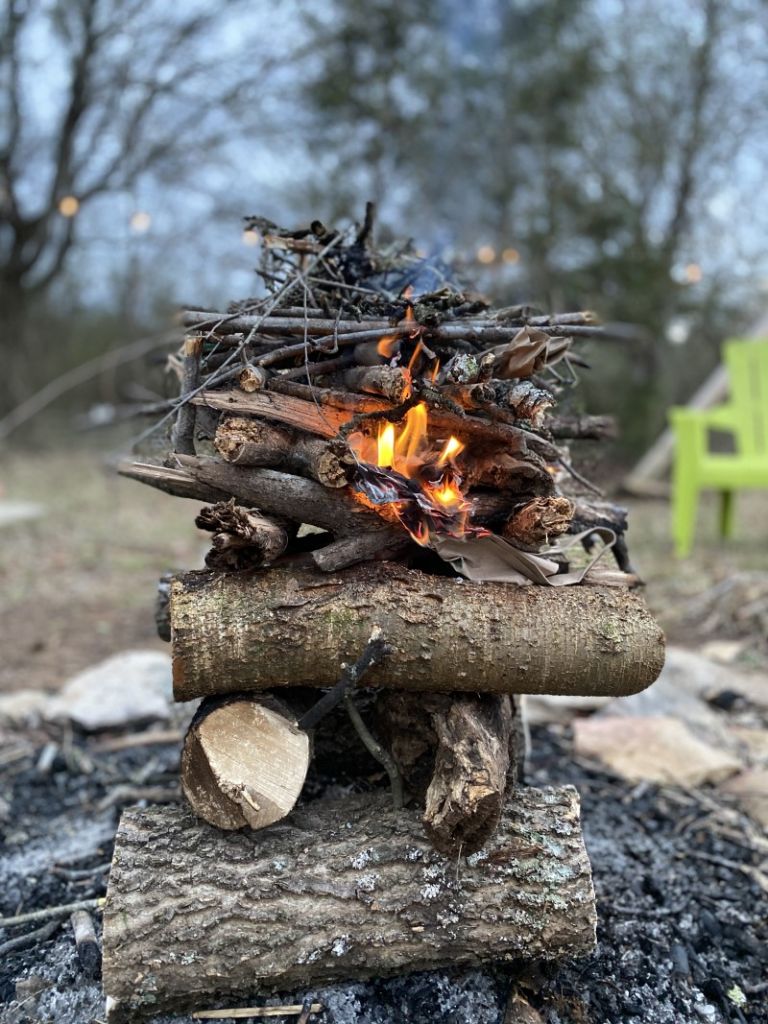
4. Add your kindling.
You can find kindling by raiding your recycling bin. I usually use a brown paper grocery bag bunched up into a log shape, toilet paper rolls, pieces of cardboard, or ripped paper. Dried leaves or pine cones work too, or you can make a cotton ball + Vaseline fire starter. Wedge your kindling inside the tower under the top layer of small sticks.
5. Light the kindling with matches or a lighter.
The flame from your kindling should spread to the pile of small sticks on top to get the fire going. As this top layer of sticks burns and creates embers, they’ll drop down to the next layer of sticks, and so on, all the way down to the big logs. As the fire gets roaring and starts burning down, you can add one log at a time to keep it going. Other than that, because of the way you built the tower, you shouldn’t have to do anything else!
6. Admire your campfire.
You built this! And you now have a skill that’s as ancient as humankind. There’s something unique, elemental, and beautiful that happens when people connect around a fire—you’ll see. Invite a few friends, add some chairs/benches/hay bales/tree stumps for seating, and let the magic happen.
One more safety note: Obviously make sure children are attended around the fire and keep a healthy distance. Be sure to extinguish your fire with plenty of water when you’re done. There are more safety rules and tips here.


